
Your roof protects your home, so it needs to be well-maintained. The right roofing contractors can spot problems and offer solutions. It is also important to use common materials, such as waterproofing membranes and sealants.
Keeping your roof in good condition can help it last longer. Schedule regular inspections with local Canberra roofers to find problems early and prevent damage.
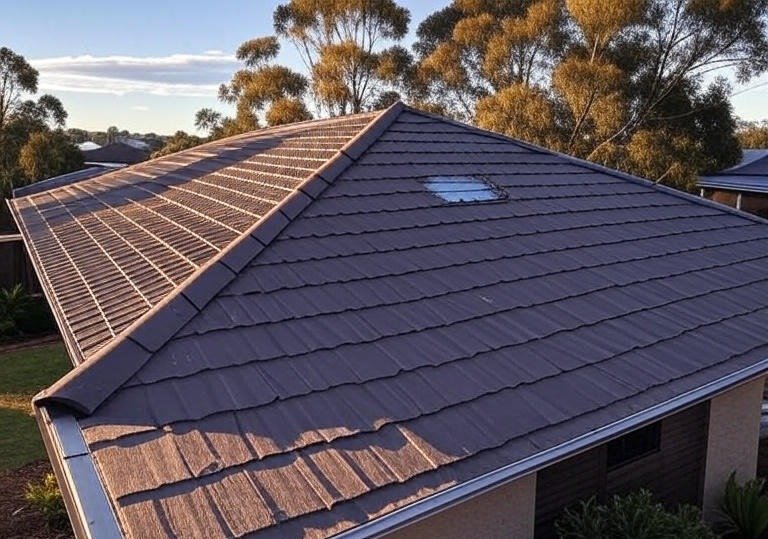
Damaged Roof Tiles
Damaged roof tiles need to be replaced as soon as possible to avoid structural problems and water leaks. Leaks can cause serious damage to the timber and walls of a home, resulting in expensive repairs. They can also lead to health issues, such as mould growth and respiratory problems. Additionally, damaged tiles can detract from the overall appearance of a home, affecting its kerb appeal and value.
- The first step in repairing tile damage is to visually inspect the roof. Look for cracked or missing tiles and note their location. It is advisable to do this with a pair of binoculars for a closer inspection. It is also important to check the flashing and ridge caps for signs of wear and tear.
- Once you have identified problem areas, it is necessary to gather your repair materials. This should include replacement tiles, roofing cement or adhesive and a pry bar. You should also prepare the area for the repairs by cleaning and removing any loose debris.
- Next, gently lift the affected tiles. Be careful not to crack any adjacent tiles as you do this. If any of the old adhesive is still on the tile, scrape it off. Clean and prep the area and install the replacement tiles, being sure to carefully align them. Apply roofing sealant to the edges of the new tiles to prevent leaks and moisture from penetrating the roof.
When you are finished, you should perform a final inspection to ensure all repairs have been successfully completed. Be sure to use appropriate personal protective equipment, such as gloves, goggles and a safety harness if working at heights. It is also a good idea to work in pairs or inform someone that you are working on the roof for additional safety.
After all, the last thing you want is to fall off your tiled roof and become seriously injured! Whether your roof is damaged by storms, ageing or poor installation, it is essential that you address any problems promptly to prevent extensive and costly repairs. Some common signs that a tile roof requires repair or replacement are:
Leaking Gutters
Gutter leaks can cause serious damage to your home, so it’s important to repair them promptly. Fortunately, most leaks are easy to fix and don’t require extensive repairs. Gutters collect rainwater and direct it away from your roof, walls, and foundations. If they’re clogged or damaged, water can overflow and seep through the sides of your house, causing rot and other problems. The best way to prevent gutter leaks is to clean and inspect your gutters regularly. You should also check downspouts for clogs. A simple blast of water from a garden hose can usually dislodge blockages and get them flowing properly again.
Over time, the joints and seals that connect gutter sections can start to separate or break. This deterioration often goes unnoticed until water starts pouring over the gutters or leaking at the seams. If this happens, you’ll need to closely inspect the affected area and reseal any broken or separated joints or seams.
During your inspection, you should look for signs of damage like holes and cracks, loose screws, and missing fasteners. You should also pay attention to the condition of your gutters and downspouts, as these are often the source of a gutter leak. You can prevent gutter leaks by regularly cleaning your gutters, trimming overhanging branches, and inspecting them for cracks or gaps.
Gutter leaks are often caused by old or rusty gutter hardware, so replacing it is a good idea. If you find a hole or crack, it’s important to use a gutter sealant patch that is made for your specific type of gutter. You can purchase these at most home improvement centers and usually cost less per clip. You should apply the sealant generously over the affected area, making sure that it covers all edges of the crack or hole.
After the sealant dries, you should run a hose to simulate rain and ensure that the area is waterproof. If it isn’t, you should repeat the process until the area is sealed and watertight. For extra security, you can add gutter brackets or hangers to strengthen weak areas and prevent future leaks.
Sagging Rooflines
Sagging rooflines are more than just a cosmetic problem, and they often indicate underlying structural issues that can threaten the safety of your home. Sagging rooflines are caused by a variety of factors, including ageing, poor construction, seismic activity, and heavy loads, and they can lead to severe damage and structural failure in the long term. Fortunately, there are a number of ways to spot early warning signs of sagging rooflines and prevent them from becoming worse.
One of the most common warning signs of sagging rooflines is visible dips or unevenness in the roofline. This can usually be spotted by taking a step back and examining the appearance of the roofline from a distance, or by comparing it to neighbouring homes. The presence of water stains and damp areas on ceilings or walls also indicates roofline problems, and may be accompanied by a noticeable loss of insulation.
It’s important to note that roof sagging can be dangerous, and you should never walk on your roof or attempt to inspect it from above. Instead, it’s best to contact a professional roofing contractor and arrange for a thorough inspection and assessment of the problem. Your roofer will be able to identify the cause of your sagging roofline, and recommend suitable solutions for repair.
For a sagging roofline that’s caused by a structural issue, the first thing your roofer will do is assess the condition of the rafters and trusses underneath the sagging area. If these are damaged or rotting, they’ll need to be replaced, and this will resolve the sagging of the roof.
Other causes of sagging rooflines include poor ventilation, and excess moisture in the attic, which can lead to condensation that weakens the sheathing. This can be prevented by ensuring that your gutters are regularly cleaned, and by installing vents in the attic to balance airflow and reduce humidity levels.
If your roofline is showing signs of sagging, it’s important to act quickly. Delaying repairs will only make the problem worse, and could result in extensive and expensive structural damage. If you’re worried about the state of your roof, be sure to arrange regular inspections with a professional roofing contractor, and follow their recommendations for maintenance and repair.
Damaged Flashings
Flashing is a vital component of your roof that prevents water from entering your home. It seals vulnerable areas like chimneys, vents, and skylights and is designed to withstand the elements. However, exposure to harsh weather conditions and improper installation can cause flashing damage. Timely flashing repairs can protect your home from water-related issues, such as mold growth, wood rot, and costly structural damage.
The primary signs of flashing damage are visible cracks or gaps. These openings can allow water to penetrate your roof, leading to damage to the interior and ceiling. It’s also important to regularly inspect your roof and flashing for leaks, which can be caused by a variety of factors including ice dams, poor drainage, and poor installation techniques.
If you have minor flashing damage, it’s often possible to repair it with roofing cement or flashing tape. However, this is a temporary fix and should be followed by a professional flashing replacement.
During the repair process, it’s important to keep detailed records of your work, including before-and-after photos, measurements, and materials used. This documentation is important for future reference, warranty claims, and when selling your house. It’s also helpful to review local building codes and regulations, as these may dictate specific materials, installation methods, or safety requirements.
To begin the repair process, remove the old flashing with a pry bar or utility knife. Carefully avoid damaging nearby shingles or roofing material, and clean the area thoroughly with a wire brush to eliminate any remaining rust or debris.
After removing the old flashing, install new flashing pieces in their place and ensure they overlap properly. Secure them with roofing nails and apply a waterproof sealant around the edges to prevent water penetration. Depending on the severity of the damage, you may need to replace the flashing entirely.
Rust or corrosion is a common cause of flashing damage, and it’s essential to address these problems quickly. Using a wire brush, remove any loose rust and treat the affected area with a rust-inhibiting primer. Then, apply a coat of roof cement or caulking to provide a watertight seal.
/